
Welcome and let's begin.
This is the documentation page for the liveAutograph email templates. Here you can find instructions on how to use our email builder, import and use MailChimp and CampaignMonitor templates.
If you have any questions that are beyond the scope of this help file, please do not hesitate to contact us using contact form on Themeforest or click the Support button.
Getting started
After purchasing a template, unzip the downloaded file from ThemeForest to the local disk on your computer. Inside the extracted folder you will find the following folders:
Note: All images that you can see on the demo have been replaced by placeholders in the downloaded archive.
LiveAutograph email builder is an online tool, it isn't included into the downloaded file.
1. Email builder
The LiveAutograph email builder is an online tool that helps you edit and build your own layout easily. You can use all modules of the template and create unlimited combinations and color variations of the template.
Using our email builder you can:
- Drag & drop any section vertically to order them as per your need.
- Clone and remove any section or some types of elements.
- Change font, size, color, weight of your content for elements used in the section.
- Adjust the spacing between content items.
- Edit images and background images by replacing URLs.
- Export your template as temp file that can be imported to continue working in the same template without losing your previous changes.
- Export your template as HTML file which can be uploaded to your email marketing system to make your email campaigns or you can export as Mailchimp or Campaign Monitor versions.
1.1 Access to the Builder
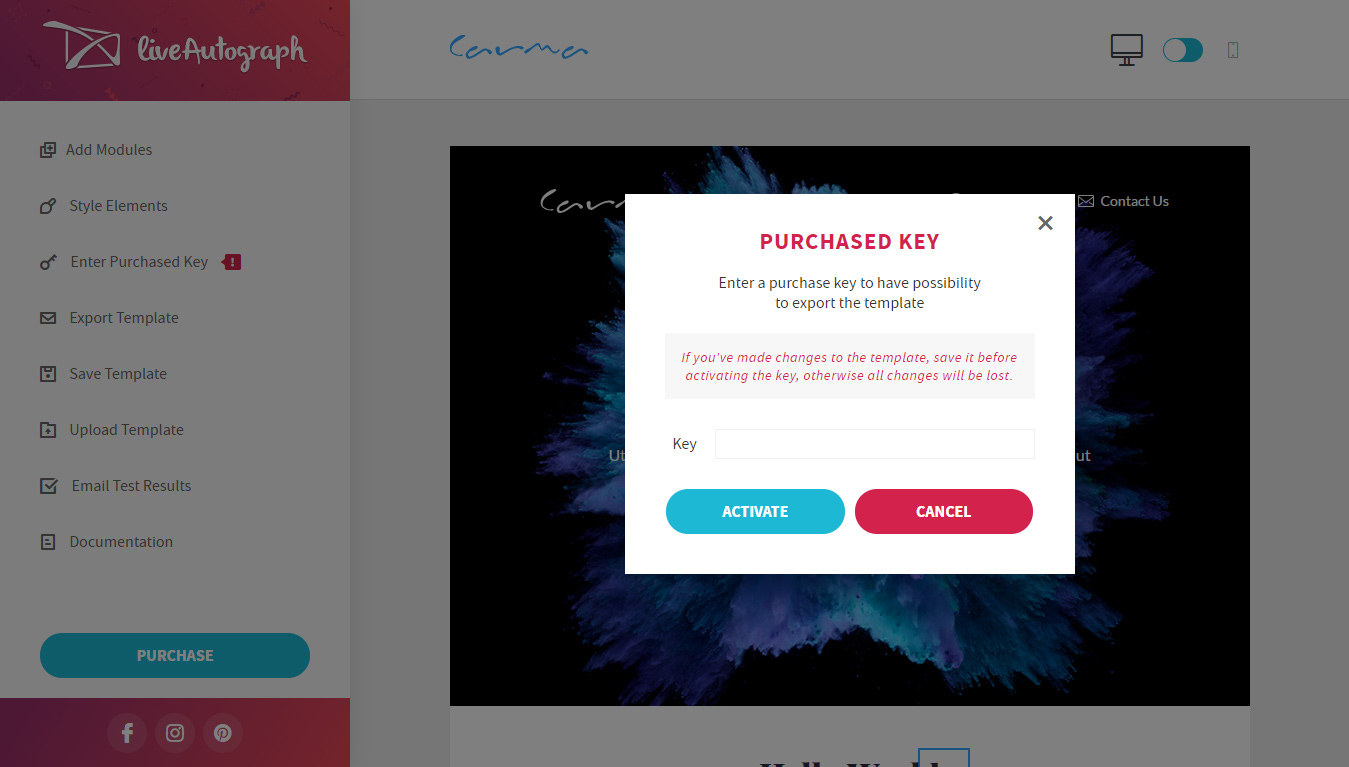
You can open the builder directly from the Live Preview on Themeforest. Then you should enter the purchased key, which you can find in the downloaded archive. Please make sure that you copied and pasted the key properly without losing any characters.
If you made changes that you do not want to lose, save them on your computer before entering the key using the 'Save Template' link in the left sidebar of the builder.
1.2 Layout modules
Builder allows to drag layout html sections onto the canvas and drop them where you'd like them to appear. Once dropped onto the canvas, the position can be changed by dragging and dropping. Blocks can be duplicated or deleted individually by clicking the corresponding icon on each block.
Some types of inner content blocks can be duplicated or deleted within a section. When you hover such elements, the corresponding icons will appear there.
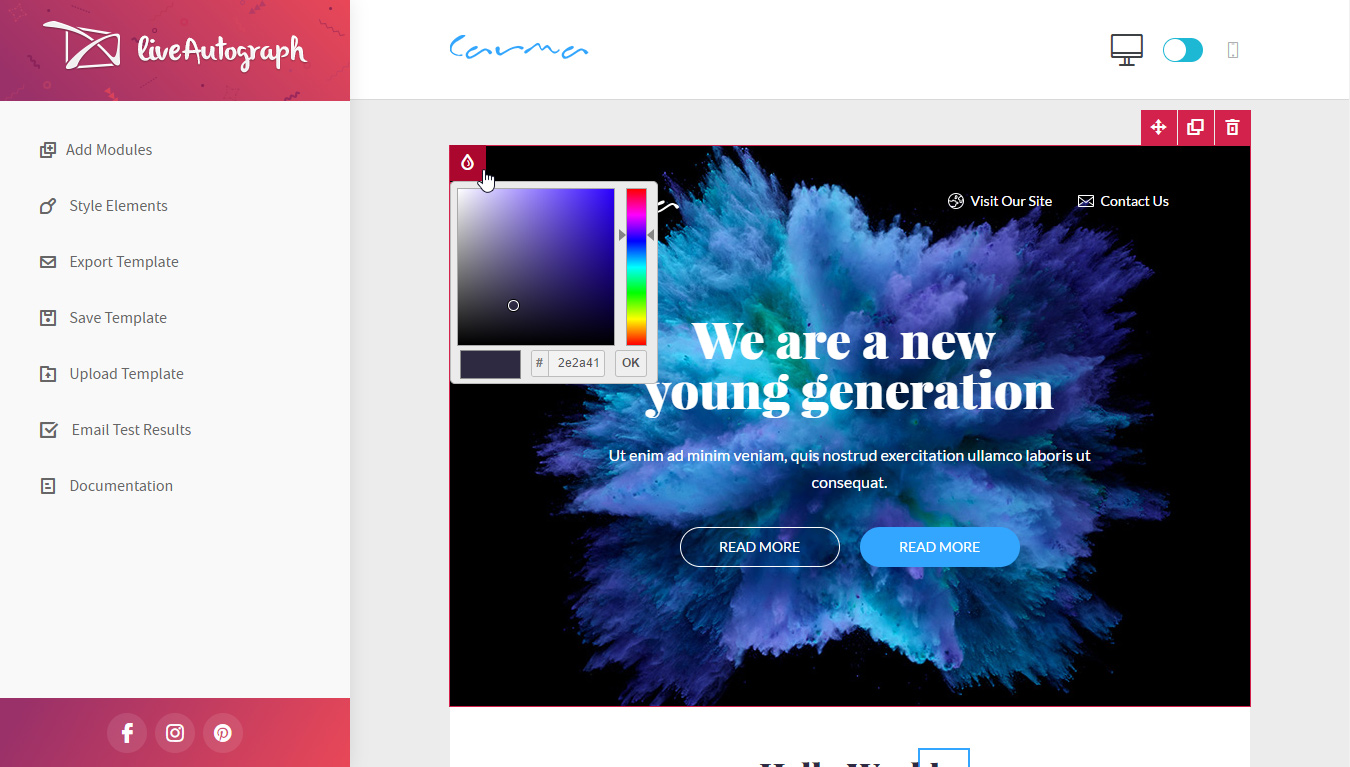
1.3 Style Editing
The builder allows to change colors of the template, creating your own color scheme. You can set the general styles for all types of buttons, titles, backgrounds in the left sidebar by clicking the 'Style Elements' link.
1.4 Images
All images can be changed by replacing their URLs. You cannot upload them from your computer directly to the email builder. You should host your images on your own server and use the image links or if you don't have it, you can use any online image hosting and use direct links to images.
If you use Mailchimp, you can upload images to their Content Manager, then copy image URL and paste into our builder as shown below:
You can add a link to any image and alternative text.
When editing a background image, you can change background color that will be visible while the image is loading.
1.5 Text Editing
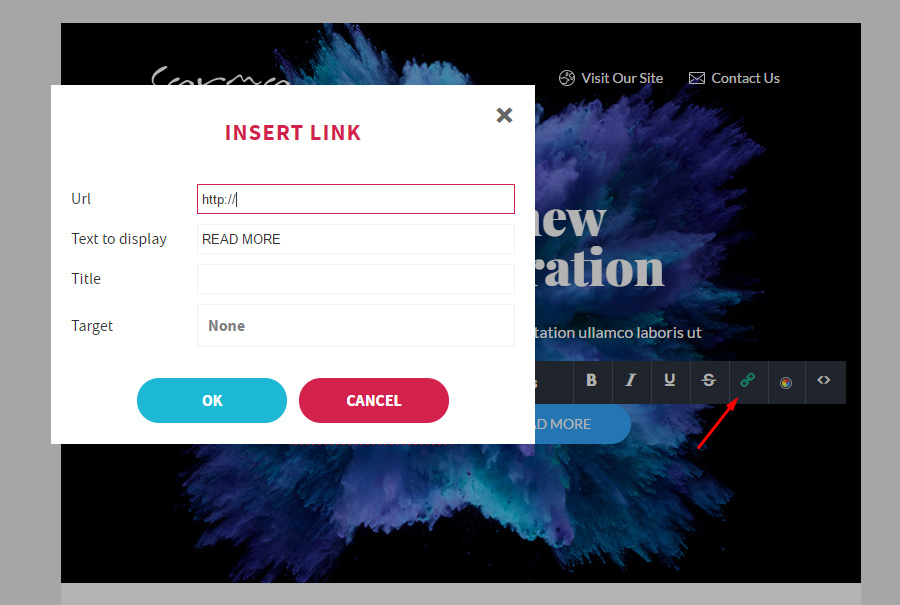
The builder contains a simple text editor, using it, you change font size, color, make the text bold, italic or underlined, add a link to the text.
Edit buttons
To change the link and text of the button, you should click on the button text and go to link editing in the opened text editor. You should edit the existing content in the opened window, you do not need to delete text directly in the button, just replace all data for button in the popup. This way ensures that you do not break the button style.
If you still delete the text in the button and try to create a new link, this link will be in blue and have the underlined style by default. To change this, you should do the following:
- Change its color using colorpicker option in the text editor
- Remove underlined style by editing source code, you need to add text-decoration: none; to the style attribute of link.
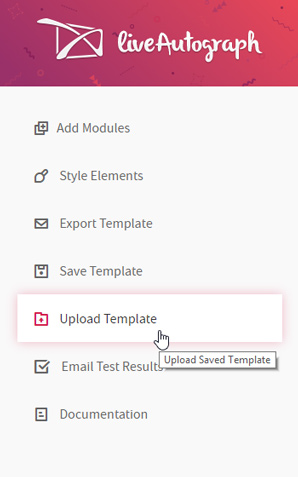
1.6 Save/Upload
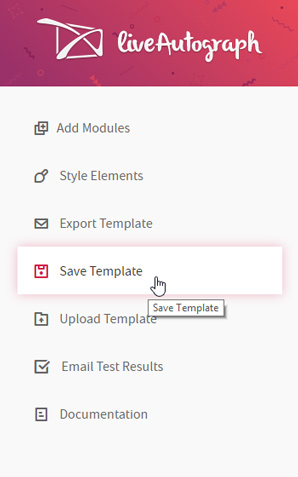
You can save any time a copy of your email template you are working on as .temp file which you can import later to continue working on the same template. Simply go to the left sidebar and click on the "Save Template" button, you will get the .temp file of your template which can be imported using the "Upload Template" button.
Exported .html file can not be imported. You can only import a file saved as .temp
1.7 Exporting
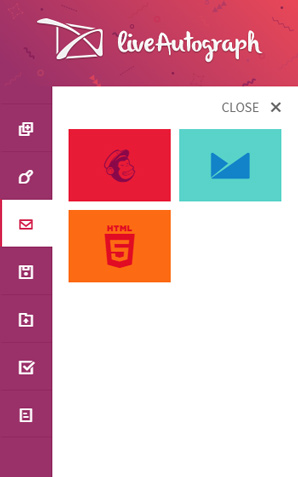
Once you finished building your template, you can download it before uploading it to your email marketing service. You can do this by clicking "Export Template" button in the left sidebar. This will grab all used HTML modules and insert them into a copy of the HTML file.
You can export html file to desktop as regular HTML, Mailchimp or Campaign Monitor versions for further content update.

Mailchimp and Campaign Monitor templates exported from the builder contain a set of existing blocks that you configured in the builder. After importing them to the corresponding service, you can edit text content and images and cannot add new modules or change the order of existing ones. If you need these features, you should use Mailchimp or Campaign Monitor templates from the downloaded archive.
2. HTML Editing
HTML code uses a table layout and inline styles for a maximum compatibility with all email clients. The code is clean, has the modular layout and commented to make it more convenient to customize. To modify the HTML code you can use any text or html editor.
Background color of the template
You can change the background color directly in the html code. For this please do as follows:
Find style properties for body at the beginning of the file in the head tag and replace the value of background-color with your color:
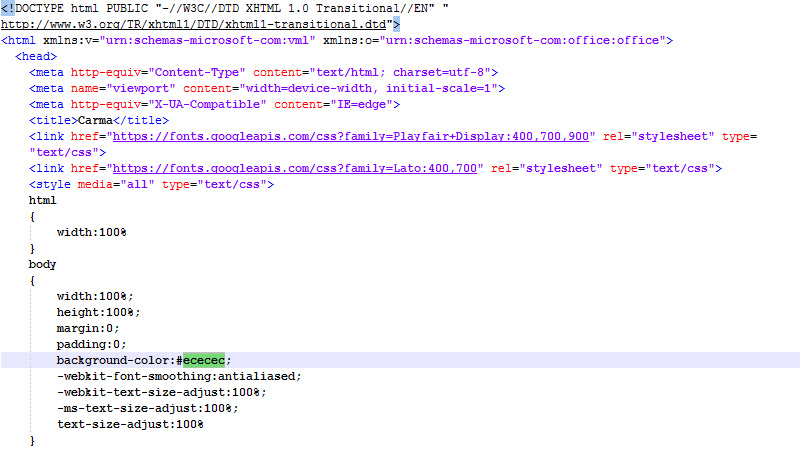
Find the body tag and change the background color in the style attribute for it and for the table following it:

Change logo
To change the logo and its size you need to find an image tag <img> with logo icon, there is a corresponding comment. Then, you should replace the URL of the image in the src and you can also change its width in the corresponding attribute, if needed.
Change background images
You need to find a section you want to change in the html code and replace URL of background-image in the style attribute and replace URL in the background="" The code with background images will be similar to the code on the screenshot below:
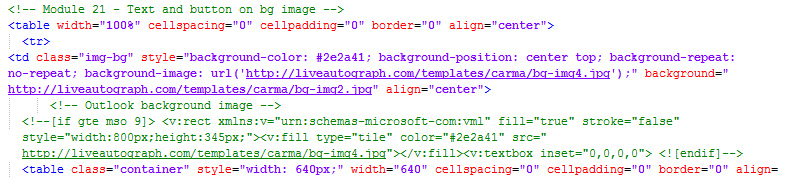
Unfortunately Outlook does not support background images by default. To force Outlook to display them we use the VML code. When changing background images, you should modify some values in the VML code, otherwise the Outlook will display the incorrect background image. This code has a corresponding comment. You have to change the following:
    <v:rect xmlns:v="urn:schemas-microsoft-com:vml" fill="true" stroke="false" style="width:800px;height:560px;"> //Change height, it should equal the height of the entire block with background image

      <v:fill type="tile" color="#ff4b15" src="http://liveautograph.com/templates/carma/header-bg.jpg"/> //Change image URL in the src

      <v:textbox inset="0,0,0,0">
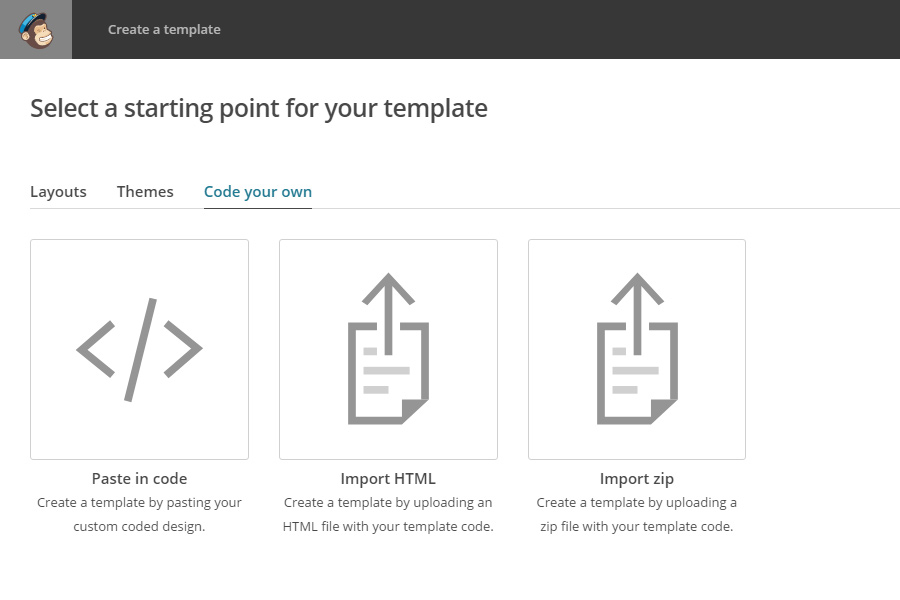
3. MailChimp
Go to your account and navigate to the 'Templates' page. Then, click on the 'Create template' button and go to the 'Code your own' tab.
You have 3 ways of using our templates in MailChimp:
1. Use template exported from the liveAutograph email builder as MailChimp template;
2. Use MailChimp template from the downloaded archive;
3. Use template exported from the builder as regular HTML template.
Please note, MailChimp editor strips the width attribute from all editable images so if template contains any high definition (retina) images or icons, you must specify explicit dimensions for all such images in the MailChimp editor. All our templates contain retina icons and images. It is necessary if you upload the MailChimp version of template (1 or 2 way).
1. MailChimp template exported from the builder
This version of template contains a set of layout modules that were configured via email builder. After importing this template, you can edit text content, images, you cannot add new modules, change color of buttons, backgrounds.
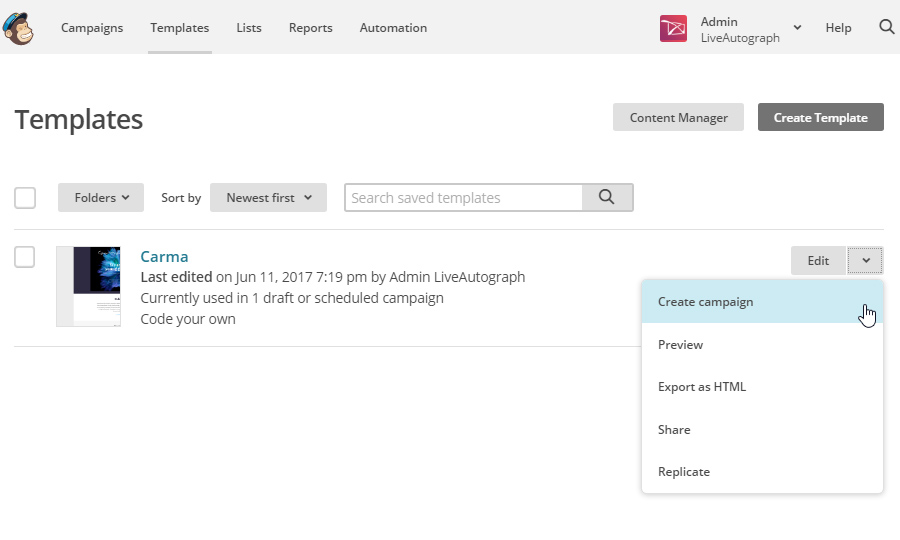
To use this template you should import the .html file that was exported from the builder as MailChimp by selecting Import HTML option. When template is imported, click 'Save and Exit'. Your template will appear on Templates page. Next, you should create a campaign using this template, as shown below, to be able to update content via Campaign Builder.
Here is the video how to upload and use an exported template from the builder:
2. MailChimp template from the downloaded archive
This version contains all available modules, you can add the modules you need while creating a campaign, edit text, images, change color of buttons, some background colours.
To upload this version of template you should use Import zip option. You can upload zip from the downloaded package or if you add any changes to unzipped template, you have to create a zip and import it into MailChimp.
Here is the video how to upload and use an exported template from the builder:
Background images cannot be changed in the MailChimp editor. We don't make them editable there because MailChimp's editor doesn't support code for background images in Outlook.com, Office 365, desktop Outlook on Windows. You can change them directly in the HTML code as described here.
3. Regular HTML template exported from the builder
If you do not intend to edit content in MailChimp's editor, you can export it from the builder as regular HTML template and upload it using Import HTML option. Using this way, you don't have to adjust the size of retina images or edit background images manually in the HTML code.
4. Campaign Monitor
Go to your account and click on the 'My templates' in your profile menu. Next, click on the 'Create a new template' button and select the 'Upload your own HTML' option.
You have 2 ways of using our templates in the Campaign Monitor. The first option is to import a template which was exported from the liveAutograph email builder. This template contains a set of layout modules that were configured via email builder. After importing this template, you can edit text content, images, duplicate or delete the modules, but you cannot add new modules or change their order.
If you are going to use this type of template you should import the template from the builder. When template is scanned and imported, it will appear on My templates page. You need to create a campaign using that template.
The second option is to use the Campaign Monitor version of the template from the downloaded archive. This template contains all available modules, you can add the modules you need while creating a campaign. There will also be available features like reorder the selected modules, editing text, changing images.
Unfortunately, background images are not able to be edited in the Campaign Monitor editor. You can change them by editing HTML code. How to do this you can read here